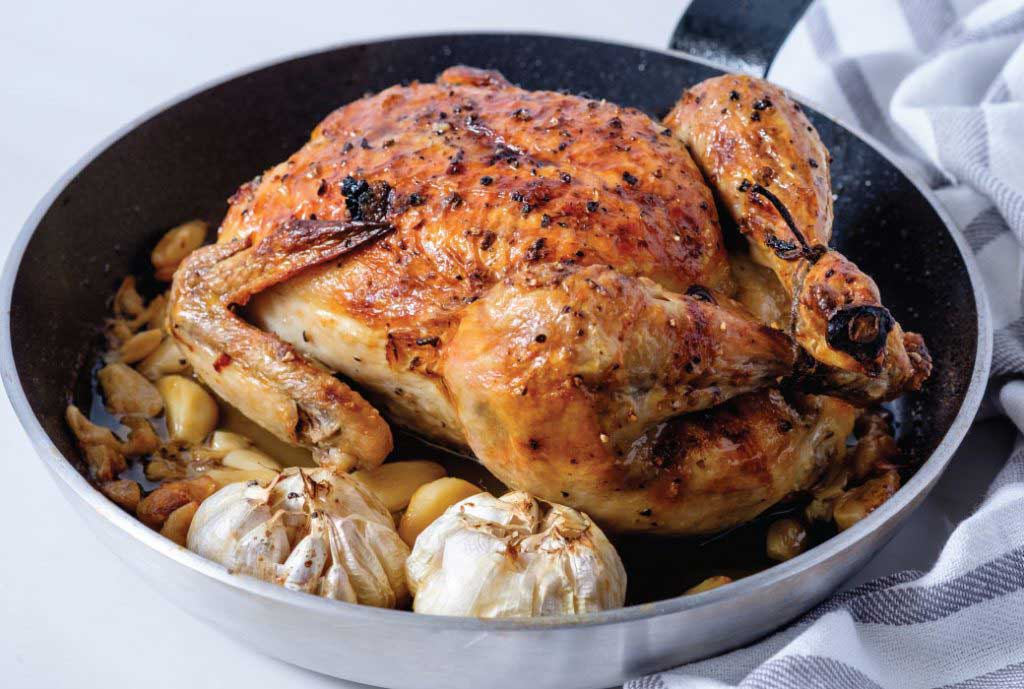
40 cloves of garlic in a dish seems way too much. That’s what I thought at first until I made this Chicken With 40 Cloves Of Garlic recipe. As the chicken roasts in the oven, the strong garlic flavor mellows down to a sweet, rich caramel taste that coats the entire meat. It’s absolutely divine! Serve it with french beans, baked or mashed potatoes and you will have a magnificent feast!

Chicken With 40 Cloves Of Garlic
40 cloves of garlic in a dish seems way too much. That’s what I thought at first until I made this Chicken With 40 Cloves Of Garlic recipe. As the chicken roasts in the oven, the strong garlic flavor mellows down to a sweet, rich caramel taste that coats the entire meat. It’s absolutely divine! Serve it with french beans, baked or mashed potatoes and you will have a magnificent feast!
Print
Pin
RateServings: 4
Ingredients
- 40 cloves Garlic peeled, 3 to 4 heads
- 2 head Garlic unpeeled
- 1 whole Chicken rinsed and patted dry (giblets removed), 3 1/2 to 4 pounds
- 1/2 slices Lemon
- Juice of 1/2 Lemon
- Sea Salt to taste
- Freshly Ground Peppercorns to taste
Instructions
- Preheat oven to 200 degrees Celsius (400 degrees Fahrenheit).
- Prepare a nonstick roasting pan or large non-stick ovenproof skillet.
- Rinse and pat dry the chicken.
- Starting at neck end, gently slide fingers under the skin of the breast and upper part of legs, loosening skin.
- Slather 2 tablespoons of butter under the skin of the breast and upper leg meat.
- Spread the remaining 2 tablespoons of butter all over the outside of the chicken.
- Pour the lemon juice all over the chicken. Season the chicken and its cavity generously with salt and pepper.
- Fill in the cavity with half of the garlic cloves and lemon slices.
- Tie the legs together using kitchen string to hold shape.
- Place remaining garlic cloves and garlic heads in a single layer, in the prepared pan.
- Place the chicken breast-side up in the middle of the pan, and roast for 50-60 minutes, basting with the buttery juices after 30 minutes.
- When the chicken is golden brown, crispy-skinned and its juices run clear, remove from the oven and leave in the pan for another 5 minutes. Using a pair of tongs, lift the chicken up, letting any juices run. Do no throw the pan juices, you will serve it with the chicken.
- Transfer the chicken to a serving platter. Cover with foil and rest for another 7-10 minutes before serving. Carve chicken, and serve with garlic, and pan juices. Dip the bread into the pan juices, and enjoy!
Notes
- Season generously. The secret in achieving a perfectly cooked roasted chicken is seasoning it inside and out with a small handful of kosher salt and freshly ground black pepper. Some spices and seasonings that go well with chicken are fresh herbs like thyme and tarragon, fresh garlic and onions, fresh lemons, paprika or chili flakes.
- Always add fat. Slather the entire chicken with butter or light olive oil. This will make the skin of the chicken crispy and the skin and moist and tender.
- Season under the skin. Slowly work your fingers or use a spoon. Start from the edge of the cavity, and slowly push away the skin from the breasts. Don’t remove the skin, just enter the meat underneath. Separate the skin from the top of the breast, but remember to leave it adhered onto the side. You will be able to reach the leg without damaging any skin by lifting the skin from the leg the same way you did for the breast. Slather your seasonings under the skin. Seasoning under the skin to give the whole chicken a mouthwatering flavor.
- Stuff the cavity with herbs, lemon halves, orange halves, a bunch of thyme, tarragon, rosemary or any type of your favourite herb for more flavorful meat. Do not over-stuff your cavity, though, as it might spill during the roasting period.
- Avoid stuffing the chicken too early because some stuffing ingredients can become a host for harmful bacteria. Do it before roasting.
- Avoid cross-contamination. Always use separate chopping boards and utensils for raw and cooked chicken. After using the chopping boards, wash them with hot soapy water.
- Do not overcook the chicken to avoid it becoming dry and tough. 1 kilogram of chicken takes about 60 minutes to cook in the preheated oven with a temperature of 180°C – 200°C.
- Cover the chicken with foil when it is cooked, and rest it for 7-10 minutes before cutting into pieces. Resting the cooked chicken will give the juices time to settle.
- You can use peeled or unpeeled garlic but I prefer peeling the garlic because it gives a more intense flavor.